Dec 01, 2016
Field Connector
In FTTH installations the optical drop cable will differ in length for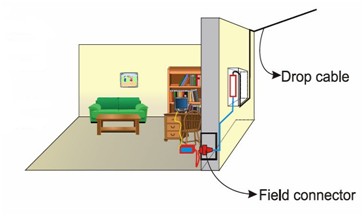
every house, traditional fixed length patch cords will not always be suitable.
The K&M field connector removes this problem as it can be fit- ted with no epoxy or power requirements in less than two minutes.
Features:
• No epoxy, no polishing
• Well suited for FTTX
• Less than two minutes assembly time
• Outstanding optical performance
Performance:
|
Insertion Loss |
Typical ≤0.30dB Max ≤0.50dB |
||
|
Return Loss |
≥40dB |
||
|
Material |
UL-V0 |
||
|
Mechanical performance |
Tensile |
30N |
ΔIL<0.3dB |
|
Durability |
10 times |
ΔIL<0.3dB |
|
|
Operating temperature |
-40°C ~ +70°C |
-40°C ~ +70°C |
|
|
Environment |
Storage temperature
Operating humidity |
-40°C ~ +80°C
≤85%(+30°C) |
|

|
Name |
Code |
Comment |
|
Field Connector |
023004820 |
Only fit to drop ca- ble |
|
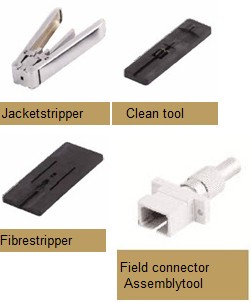
Jacket stripper |
051000030 |
Special tool |
|
Fibre stripper |
051000000 |
Special tool |
|
Clean tool |
051000010 |
Special tool |
|
Field connector assembly tool |
051000020 |
Special tool |
|
Cutter |
- |
General tool |
|
End face inspector |
- |
General tool |
Problem
Fiber Optic Connectors that require no epoxy and no polishing--often referred to as "quick-connect" connectors--have grown in popularity and are now widely used. Because a quick-connect connector is preloaded with a fiber stub that has been bonded and polished at the factory, it is sensitive to the quality of the cleave made to the fiber to be terminated. If proper installation procedures--particularly cleaving procedures--are not , these connectors may fail and be perceived as unreliable.
Solution
Take care when cleaving the bare fiber, and check the cleave before terminating the fiber.
Procedure
1) Prepare the Fiber Optic Cable for termination as you normally would, by stripping away the outer jacket, buffer, and cladding and cutting away excess aramid yarn.
2) Using a fiber cleaver (usually included in the toolkits sold for these connectors), score the fiber with a single, light touch. Do not press the cleaver more than once, because doing so may make additional scores on the fiber and eventually cause it to break.
3) Break the fiber by bending it together with the tongue of the cleaver.
4) Examine the fiber with a microscope designed to inspect fiber cleaves. Ensure that the cleave is square and that there are no chips in the fiber. (Some manufacturers` toolkits include such microscopes. They have side ports in which you insert the cleaved fibers.)
5) Using the measuring card that is included with the manufacturer`s toolkit, or using the scale on the cleaver, measure the bare fiber to ensure it is the proper length. If the bare fiber is too short, it will not reach the fiber inside the connector, and the connector will not work.
6) Clean the fiber with alcohol wipes that have at least 90% isopropyl alcohol content and lint-free material.
7) Carefully insert the bare fiber into the connector until it meets the preloaded fiber stub.
Using the manufacturer`s crimping tool, crimp the connector onto the buffer.
Test connectors periodically during the installation, rather than testing them all after the job is completed. Periodic testing eliminates the possibility of repeating the same errors throughout the installation.
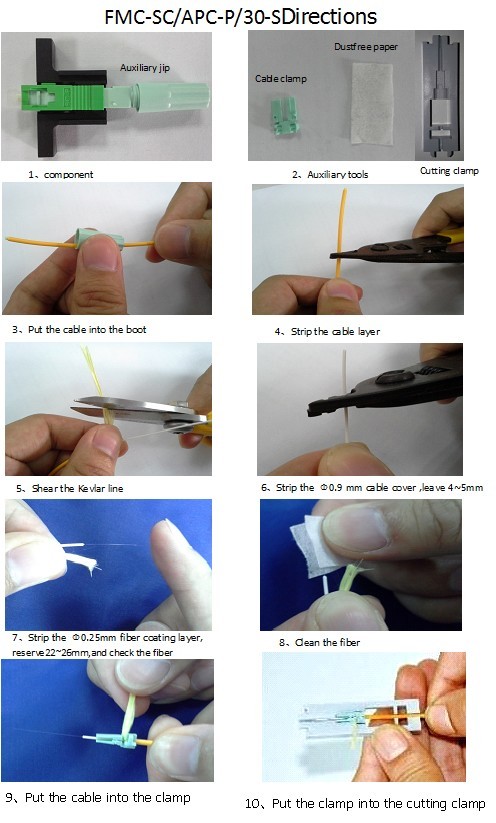
Let’s check below Sample of installing SC/APC Fast Connector
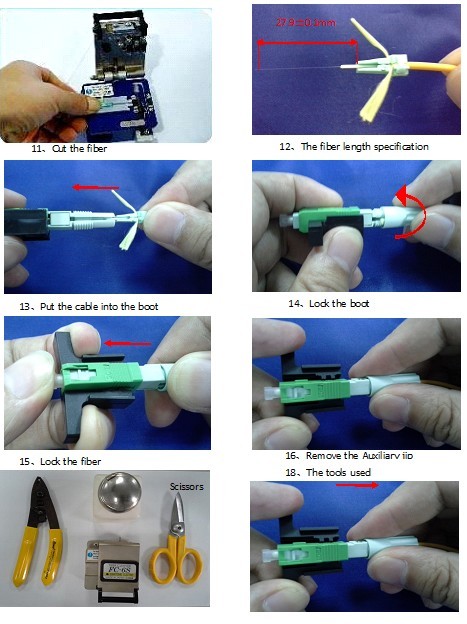
Ⅱ Disassembly
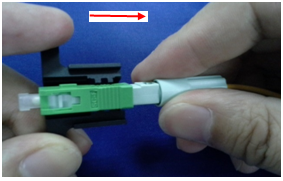
1. Unlock the fiber
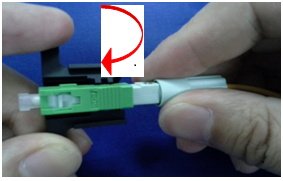
2、Remove the threaded boot
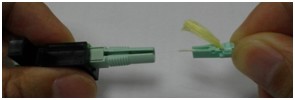
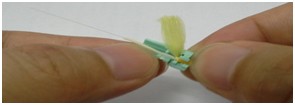
3、Put out the clamp and the fiber

Need a quote? Have a question ? Ask us!
K&M's Fiber Termination Box(FTB) Compliance with YD/T 778, YD/T 1636-2007, and YD/T893-1997
Outdoor Waterproof Patch Cord mainly used in ocean communication, airborne communication, military, ...
Description * High reliability, stability * The quality is more credible and stable than fusion coup...
Application: 1000BASE-T Gigabit Ethernet 10BASE-T,100BASE-T Fast Ethernet(IEEE&n...
A fiber optic patch cord is a fiber optic cable capped at either end with connectors that allow it t...